Android: how to create a loading screen – Part 1
Posted by Dimitri | Jan 17th, 2012 | Filed under Programming

This is the first of three Android post in a series that explains how to code a simple loading screen that shows the progress of operation before the application’s View is loaded. This first tutorial objective is to create this loading screen in simplest way possible. The code featured in this tutorial has been developed and tested in Android 2.1, but it should work without much modification in later versions. All code featured in this tutorial is available for download at the end of the post.
Because of the nature of the Android operational system and the Activity stack, there’s no way to precisely determine the loading progress of an Activity. That’s why, in the below example, the Activity is going to be started, but instead of loading the standard View, it will load a ProgressDialog object and simulate a computationally heavy process on a background thread right on the beginning of the onCreate() method.
The progress is going to be updated on the screen while the background operation occurs. After it finishes, the progress dialog will close and the application’s View will be loaded. That all sounds very straightforward, but remember that the user interface thread can’t be blocked for more than five seconds. So, computationally heavy operations or operations that takes an unknown time to complete (like downloading a file) can’t be started there. By placing these operations on a separate thread, another problem arises: the View can’t be updated from a background thread, unless it’s done through a Handler object, which in turn would require a Thread object.
Many people don’t like using the Thread and Handler objects, for many reasons, like code readability and complexity issues, just to name a few. The alternative is to use the AsyncTask class that basically encapsulates the Handler and Thread class functionality in a more developer friendly abstract class. Since it’s abstract, the AsyncTask has to be inherited from another class to be used and it’s methods must be overridden.
Here’s the code:
package fortyonepost.lsa;

import android.app.Activity;
import android.app.ProgressDialog;
import android.os.AsyncTask;
import android.os.Bundle;

public class LoadingScreenActivity extends Activity
{
	//A ProgressDialog object
	private ProgressDialog progressDialog;

    /** Called when the activity is first created. */
    @Override
    public void onCreate(Bundle savedInstanceState)
    {
    	super.onCreate(savedInstanceState);

    	//Initialize a LoadViewTask object and call the execute() method
    	new LoadViewTask().execute();

    }

    //To use the AsyncTask, it must be subclassed
    private class LoadViewTask extends AsyncTask<Void, Integer, Void>
    {
    	//Before running code in separate thread
		@Override
		protected void onPreExecute()
		{
			//Create a new progress dialog
			progressDialog = new ProgressDialog(LoadingScreenActivity.this);
			//Set the progress dialog to display a horizontal progress bar
			progressDialog.setProgressStyle(ProgressDialog.STYLE_HORIZONTAL);
			//Set the dialog title to 'Loading...'
			progressDialog.setTitle("Loading...");
			//Set the dialog message to 'Loading application View, please wait...'
			progressDialog.setMessage("Loading application View, please wait...");
			//This dialog can't be canceled by pressing the back key
			progressDialog.setCancelable(false);
			//This dialog isn't indeterminate
			progressDialog.setIndeterminate(false);
			//The maximum number of items is 100
			progressDialog.setMax(100);
			//Set the current progress to zero
			progressDialog.setProgress(0);
			//Display the progress dialog
			progressDialog.show();
		}

		//The code to be executed in a background thread.
		@Override
		protected Void doInBackground(Void... params)
		{
			/* This is just a code that delays the thread execution 4 times,
			 * during 850 milliseconds and updates the current progress. This
			 * is where the code that is going to be executed on a background
			 * thread must be placed.
			 */
			try
			{
				//Get the current thread's token
				synchronized (this)
				{
					//Initialize an integer (that will act as a counter) to zero
					int counter = 0;
					//While the counter is smaller than four
					while(counter <= 4)
					{
						//Wait 850 milliseconds
						this.wait(850);
						//Increment the counter
						counter++;
						//Set the current progress.
						//This value is going to be passed to the onProgressUpdate() method.
						publishProgress(counter*25);
					}
				}
			}
			catch (InterruptedException e)
			{
				e.printStackTrace();
			}
			return null;
		}

		//Update the progress
		@Override
		protected void onProgressUpdate(Integer... values)
		{
			//set the current progress of the progress dialog
			progressDialog.setProgress(values[0]);
		}

		//after executing the code in the thread
		@Override
		protected void onPostExecute(Void result)
		{
			//close the progress dialog
			progressDialog.dismiss();
			//initialize the View
			setContentView(R.layout.main);
		}
    }
}
Here’s how it works: a ProgressDialog object is defined at line 11. Then, instead of setting the Activity’s View at the onCreate() method, the execute() method from a LoadViewTask object is going to be called (line 20). The LoadViewTask is being declared as a inner class, extending the AsyncTask abstract class (line 25) . This class takes 3 generics in it’s declaration. Because the goal was to create a simple progress dialog, the generics where set to Void, Integer and Void. These generic data types are later used by the methods that are needed to be implemented in order to make the AsyncTask work.
The first method being overridden is onPreExecute(). As the name suggests, this method executes code before running the background thread. In the above example, the progressDialog is initialized and displayed on the screen (lines 31 through 48). It’s maximum value is conveniently set to 100 but it could be anything else (line 44). The great thing about the ProgressDialog class is that the progress percentage is automatically calculated, properly sized and displayed on the progress bar. As an example, if the maximum value was set to 200, and the progress set to 100, the progress bar would display a total progress of 50%. Now, back to the code, the dialog is rendered on the screen by calling the show() method (line 48).
The second method being overridden in this class is the doInBackGround() method. It’s the only method that has to be implemented when inheriting from AsyncTask, as it executes code on the background thread. To simulate an expensive operation on the background thread, the code calls the wait() method of the thread every 850 milliseconds, until the counter is greater than 4 (lines 60 through 84). This method can’t update the View, just execute code. After that, the publishProgress() method is being called at line 92. It updates the progress in multiples of 25 based on the counter value. By calling this method, the execution of the onProgressUpdate() is triggered.
Inside the aforementioned method, the progress bar of the ProgressDialog object is updated with the value passed from the publishProgress() method calls, meaning that the Activity’s View is going to be refreshed (lines 89 through 93). It knows the progress is an integer because of the generics Integer placeholder declaration previously placed at the class definition (line 25).
Finally, the onPostExecute() method, which executes code after doInBackGround(), closes the progress dialog and loads the View from the ‘main.xml’ file (lines 100 and 102). That’s all there is to it.
Here’s some screenshots of the application:

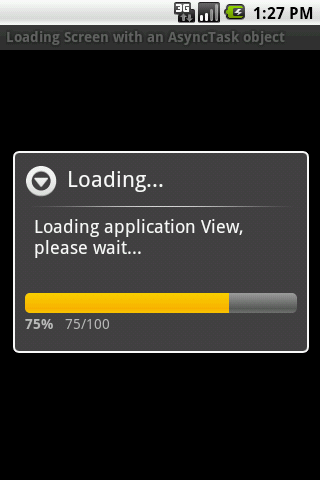
This is what the application looks like right after it's launched. The current progress is displayed on the left and the current/remaining items are being displayed on the right.

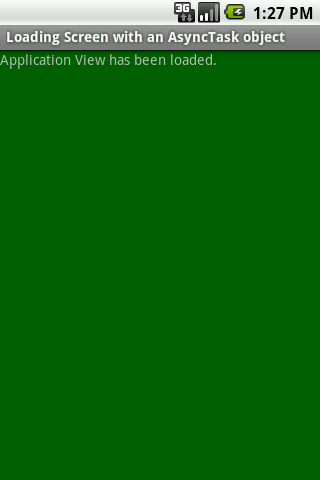
After the loading process has finished, the progress dialog is closed and this View is loaded. Its background has been set to green on purpose to differentiate it from the previous View.
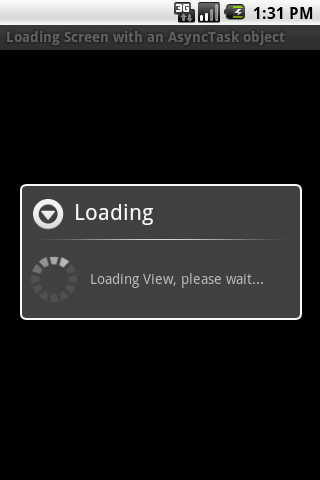
To show only a indeterminate progress disk, replace lines 32 through 48 with:
progressDialog = ProgressDialog.show(LoadingScreenActivity.this,"Loading...",
    "Loading application View, please wait...", false, false);
So the progress bar will look like this:

By replacing lines 32 through 48 with the above code, the loading screen will look like this.
Here’s the Eclipse source project:
Downloads
The above example can be adapted for loading a game, for example. At the next post on the series, we are going to see how this same code can be rewritten using the Handler and Thread object combination.
Read the second part here: Android: how to create a loading screen – Part 2.


Thanx for the post. :)
This is really good – it worked! (after going through like 10 other sites)
Great and simple solutions
saved lots of my time.
i have a problem with main “cannot be resolved”
what should i do ???
Gr8 tuto! Tks 4 share it buddy!
Thanks :) it worked. Is there anyway to get rid of the box / loading window out line ?
great tutorial…
how to show file name also with progress in dialog .
Thanks for share it…
Hi, I think your website might be having browser compatibility issues.
When I look at your website in Ie, it looks fine but when opening in Internet Explorer, it has some overlapping.
I just wanted to give you a quick heads up!
Other then that, amazing blog!
Thahks for this interesting post, I have shared it on Twitter.