How to add shaders to Ocarina of Time
Posted by Dimitri | Oct 21st, 2010 | Filed under Featured, Retro Games

This post explains how to add shaders to 1964, a Nintendo 64 emulator, meaning that it is possible to emulate N64 games with effects like bloom, HDR, or even sepia. It can be done without high resolution texture packs, but if you want to learn how to replace the original game’s texture for better results, check out this post: How to play Ocarina of Time with high resolution textures.
The first step is to download the 1964 emulator. By the time this post had been written, the latest version was the 1.1.0, found at: 1964 Download Page.
The 1964_11.rar file comes with the emulator executable and source code. The emulator executable is at the bin/release folder. Extract all contents of the Release folder to some place you can find later.
To use shaders, you will need the Mudlord’s Rice Video Plugin. Download the version 6.1.4 here; it’s the file named RiceVideoSetup.exe. Run the setup, and select the emulator folder as the installation directory. After installation, open the emulator and select Mudlord’s Rice Video Build 6.1.3 – DX9 as the default video plug-in.
Now, download Mudlord’s Generic HLSL shader patch + shaders from Mudlord’s Code website.
Your antivirus software may accuse this as a threat due to the patch.exe file. We won’t need this file, so download the shaders_bin.rar with another operating system or just disable your antivirus temporally and remove the patch.exe from the rar file.
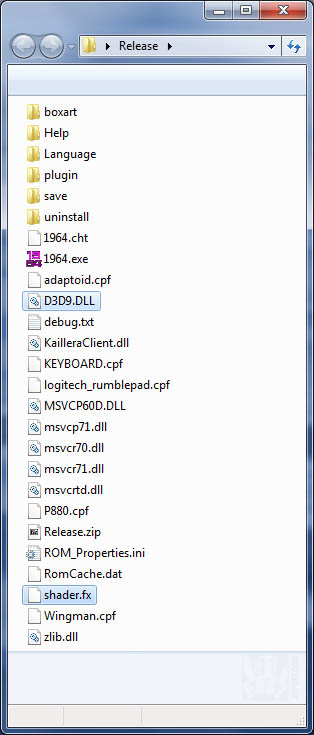
After that, extract d4rk.dll to the 1964’s executable folder and rename it to D3D9.DLL. Select the shader you want to use from the shaders_bin.rar file and place it in the same folder. Case you don’t know which one to select, start with the Bloom (SM3) shader. Your 1964 folder should look like this:
Only one shader can be run at a time. If you want to use other shaders that are not included in Mudlord’s Pack, place it at the same folder as the D3D9.DLL file, and rename it to shader.fx. Make sure the shader was written with HLSL language.
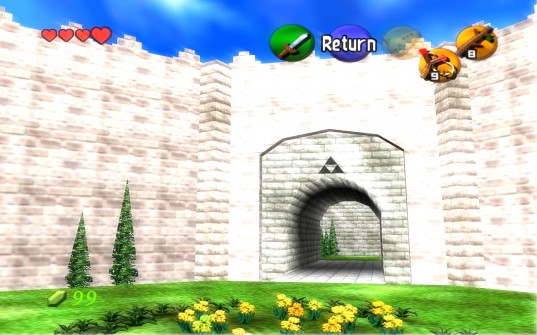
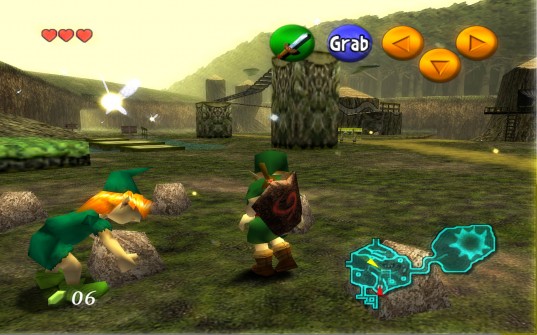
Here are some screenshots with high resolution textures and Bloom(SM3) shader enabled:
This method can be applied to practically any game or emulator that uses the DirectX 9, by copying the D3D9.DLL and a shader file where the game/emulator executable is located. But be careful when using this with MMO’s and digital distribution platforms like Steam, as it could probably be detected as cheating.
UPDATE: I’ve tested this method with a most up to date version of the plug-in, named Aristotle Mudlord Rice Video 6.1.9, but couldn’t get it to work with shaders, although the replaced textures looked better than ever. If you want to try it, download it here. For a most up-to-date texture pack, visit N64 Redux. This is a video of the game with some textures replaced and with a bloom shader effect:


hmmmmmmmm…made me fell like playing that game again….
well i haven’t beat Master Quest yet anyway
Master Quest is for crazy people. Very cool with shader indeed.
Looks pretty cool.
Hahaha, Bruno Eduardo’s comment made my day. I was just thinking what zelda game to play right now and I had chosen master quest hahaha
I’m just posting this in case someone reads it, if you want to use shaders with Aristote Mudlord Rice Video plugin 6.1.9 (or even Rice 6.1.4) that makes the highres textures look much much better, you can use a dx8 to dx9 converter, you can find one on enbdev.com
All you need to do is drop the d3d8.dll in 1964’s executable folder next to the shader’s D3D9.dll
Cool, thanks for sharing!