Android: how to create a loading screen – Part 3
Posted by Dimitri | Jan 26th, 2012 | Filed under Featured, Programming

This is the third and final post of a series that explains how to code a loading screen for Android. The other two previous posts (which can be found here and here), used two distinct approaches to solve the problem of executing code on a background thread and update the progress back to the application’s UI thread. However, both of them relied on an instance of the ProgressDialog class to display the current progress. In the following paragraphs, instead of using this type of dialog, a custom View inflated from a layout XML file is going to be created to achieve that purpose.
As the other two previous posts, all the code in this article has been created and tested in Android 2.1. An example Eclipse project is available at the end of the post.
The first step in using a customized View as a loading screen is to define its contents on a layout XML file. It should contain a ProgressBar element, so that the background thread progress can be displayed. It’s not mandatory to do so, but it’s just a nicer way to display the progress of an operation than simply printing the progress percentage on a TextView. For this tutorial, the following XML layout has been created:

This layout has been named 'loadingscreen.xml' and saved inside the res/layout folder.
To check out this layout code specifics, download the example project at the end of the post. The other View this application loads is just a RelativeLayout with a TextView. This other layout is the same one that has been used on the second post of the series. Therefore there’s no need to explain it in detail. As for the code, the Activity below uses an AsyncTask class to execute code on a background thread and update the progress, just like the first post of the series. However, this time, a ViewSwitcher is going to be used. As the name suggests, this class can switch between two Views. The main.xml and loadingscreen.xml are going to inflate the two View objects that the ViewSwitcher holds. The code execution progress is going to be updated to the progress bar of the first View; and when the background thread is done, the ViewSwitcher is going to swap to the application’s main View. Here’s the code:
package fortyonepost.com.lscv;

import android.app.Activity;
import android.os.AsyncTask;
import android.os.Bundle;
import android.widget.ProgressBar;
import android.widget.TextView;
import android.widget.ViewSwitcher;

public class LoadingScreenActivity extends Activity
{
	//creates a ViewSwitcher object, to switch between Views
	private ViewSwitcher viewSwitcher;

    /** Called when the activity is first created. */
    @Override
    public void onCreate(Bundle savedInstanceState)
    {
        super.onCreate(savedInstanceState);

		//Initialize a LoadViewTask object and call the execute() method
        new LoadViewTask().execute();
    }

    //To use the AsyncTask, it must be subclassed
    private class LoadViewTask extends AsyncTask
    {
    	//A TextView object and a ProgressBar object
    	private TextView tv_progress;
    	private ProgressBar pb_progressBar;

    	//Before running code in the separate thread
		@Override
		protected void onPreExecute()
		{
			//Initialize the ViewSwitcher object
	        viewSwitcher = new ViewSwitcher(LoadingScreenActivity.this);
	        /* Initialize the loading screen with data from the 'loadingscreen.xml' layout xml file.
	         * Add the initialized View to the viewSwitcher.*/
			viewSwitcher.addView(ViewSwitcher.inflate(LoadingScreenActivity.this, R.layout.loadingscreen, null));

			//Initialize the TextView and ProgressBar instances - IMPORTANT: call findViewById() from viewSwitcher.
			tv_progress = (TextView) viewSwitcher.findViewById(R.id.tv_progress);
			pb_progressBar = (ProgressBar) viewSwitcher.findViewById(R.id.pb_progressbar);
			//Sets the maximum value of the progress bar to 100
			pb_progressBar.setMax(100);

			//Set ViewSwitcher instance as the current View.
			setContentView(viewSwitcher);
		}

		//The code to be executed in a background thread.
		@Override
		protected Void doInBackground(Void... params)
		{
			/* This is just a code that delays the thread execution 4 times,
			 * during 850 milliseconds and updates the current progress. This
			 * is where the code that is going to be executed on a background
			 * thread must be placed.
			 */
			try
			{
				//Get the current thread's token
				synchronized (this)
				{
					//Initialize an integer (that will act as a counter) to zero
					int counter = 0;
					//While the counter is smaller than four
					while(counter <= 4)
					{
						//Wait 850 milliseconds
						this.wait(850);
						//Increment the counter
						counter++;
						//Set the current progress.
						//This value is going to be passed to the onProgressUpdate() method.
						publishProgress(counter*25);
					}
				}
			}
			catch (InterruptedException e)
			{
				e.printStackTrace();
			}
			return null;
		}

		//Update the TextView and the progress at progress bar
		@Override
		protected void onProgressUpdate(Integer... values)
		{
			//Update the progress at the UI if progress value is smaller than 100
			if(values[0] <= 100)
			{
				tv_progress.setText("Progress: " + Integer.toString(values[0]) + "%");
				pb_progressBar.setProgress(values[0]);
			}
		}

		//After executing the code in the thread
		@Override
		protected void onPostExecute(Void result)
		{
			/* Initialize the application's main interface from the 'main.xml' layout xml file.
	         * Add the initialized View to the viewSwitcher.*/
			viewSwitcher.addView(ViewSwitcher.inflate(LoadingScreenActivity.this, R.layout.main, null));
			//Switch the Views
			viewSwitcher.showNext();
		}
    }

    //Override the default back key behavior
    @Override
    public void onBackPressed()
    {
    	//Emulate the progressDialog.setCancelable(false) behavior
    	//If the first view is being shown
    	if(viewSwitcher.getDisplayedChild() == 0)
    	{
    		//Do nothing
    		return;
    	}
    	else
    	{
    		//Finishes the current Activity
    		super.onBackPressed();
    	}
    }
}
At the beginning of this Activity, a ViewSwitcher object is being declared (line 13). Next there’s the OnCreate() method definition, that initializes a LoadViewTask object and calls it’s execute() method (line 22).
The LoadViewTask is a inner class being defined right below the onCreate() method (line 26). This class inherits from AsyncTask, which is responsible for executing code in a background thread and posting the results on the application’s main UI thread (for more details, read the first post of the series) . This is where it all happens.
It features two private members: a TextView and a ProgressBar (declared at lines 29 and 30). Next, the onPreExecute() is being overridden. Inside it, the ViewSwitcher object is initialized using the containing Activity’s Context (line 37). Right after that, a View object is being initialized with the data contained at the loadingscreen.xml file and being added as the first View of the viewSwitcher (line 40).
The ViewSwitcher class is a child of ViewGroup. This parent class act as a root for the layouts of an Activity. For that reason, the View class static method inflate() has been called from the viewSwitcher object, and not from the View class itself. That way, instead of adding the recently inflated View to the Activity’s default ViewGroup, it is added to our ViewSwitcher object (line 40).
For that same reason, the ProgressBar and TextView objects are being inflated by calling the findViewById() method from viewSwitcher (lines 43 and 44). Doing a standard findViewById() method call from the Activity to initialize these Views wouldn’t initialize this objects, since it would return null.
Moving on, the last two lines of code in the onPreExecute() method sets the progress bar maximum value to 100 and sets the Activity View as the ViewSwitcher object (lines 46 and 49). The doInbackground() method is where the code that has to be executed on a background thread must be placed. It’s exactly the same one featured on the first post of the series (lines 54 through 86).
For this example, it simulates a computationally heavy operation by blocking the background thread 4 times every 850 milliseconds. Every time it does that, the current progress is passed to the UI thread with the publishProgress() method call (line 77).
By doing so, the onProgress() method is invoked. This method updates the user interface on the application’s main thread. At the above code, this method is checking if the current progress isn’t more than 100. Case that’s true, the TextView and ProgressBar objects are updated to display the current progress (lines 90 through 98).
The last method being defined by the LoadViewTask class is the onPostExecute() method. As the name suggests, it’s execution is triggered after the execution of the code on the background thread. For the loading screen, it inflates a View object from the main.xml file and adds it as the ViewSwitcher object (line 106). Now, since the background thread won’t execute more code and the main View has been loaded, viewSwitcher.showNext() can be called, replacing the loading screen with the application’s main interface (line 108). And that’s the end of the LoadViewTask class definition.
To achieve the same behavior as the the first and second posts of the series, which doesn’t allow the user to cancel the loading progress by pressing the back button, the Activity’s onBackPressed() is being overridden. It checks whether the current View is the loading screen, nullifying the back key press if it does and allowing the Activity to be finished if it doesn’t.
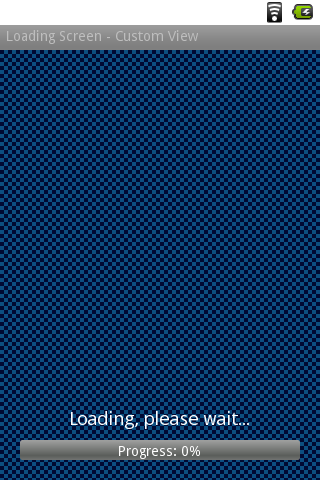
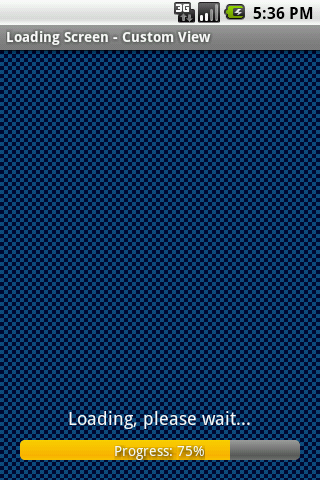
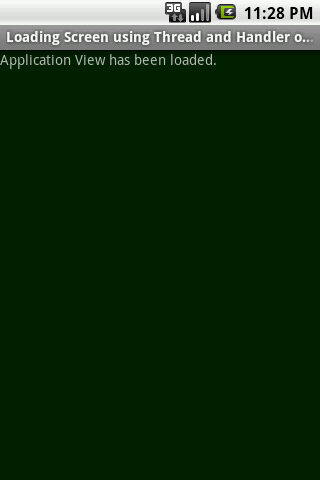
That’s it! Here are some screenshots of this Activity in action:

This is what the customized loading screen looks like.

After the loading process has finished, this View is loaded.
There are two observations that are needed to be made about the above code. The first one is that the ViewSwitcher has been used to replace all the View elements on the screen. However, it can be used to switch just a single element of the current View. The ViewSwitcher can also be defined as an element of a layout XML file, so as its containing two Views. But, in this code, I was aiming for loading the second View as late as possible, which leads to the second observation: both ViewSwitcher object and it’s pair of Views could be initialized and configured at the beginning of the Activity, right on the OnCreate() method. But, as previously mentioned, this application objective was to delay the main application View initialization as much as possible.
Here’s the example code:


Excellent post and work, a piece of craftsmanship. Way to work!
Thanks Dude, your tutorial help me to make my first game: http://goo.gl/PfAEF
Thx
Hi,
Please help me, How to start other activity after run loading screen ?
this is good development, after i see it, i think that i can use this for my apps…
thank you very much…