Unity: displaying the video input from multiple webcams
Posted by Dimitri | Jul 22nd, 2012 | Filed under Programming

This post explains how to capture the images from a web camera connected to the computer and use them as a texture in Unity. However, this tutorial focuses on switching between the video inputs from different webcams attached to desktop computers (PC and Mac). However it should work on Android with some minor modifications. The code featured in this article has been developed and tested using a free license of Unity 3.5.3f3. As usual an example project with all the code featured in this article is available for download at the end of the post.
Before explaining how to choose from a list of multiple connected webcams to render from, let’s see how to preview the captured images from a single camera. Doing that in Unity is very simple and it can be achieved with just a few lines of code. Take a look at this C# script:
using UnityEngine;
using System.Collections;

public class SingleWebCamPreview : MonoBehaviour
{
	//The texture that holds the video captured by the webcam
	private WebCamTexture webCamTexture;

	// Use this for initialization
	void Start ()
	{
		//Initialize the webCamTexture
		webCamTexture = new WebCamTexture();
		//Assign the images captured by the first available webcam as the texture of the containing game object
        renderer.material.mainTexture = webCamTexture;
		//Start streaming the images captured by the webcam into the texture
        webCamTexture.Play();
	}
}
The above script features only a single member variable declaration: an object from the WebCamTexture class (line 07). As the name suggests, this class takes the input of a webcam and encodes it as a Unity texture. At the Start() method, the webCamTexture variable is being initialized and it’s being set as the containing game object’s texture (lines 13 and 15). Finally, the camera input stream to a Texture is started at line 17, by calling the Play() method from the webCamTexture. Just connect a webcam to the computer, create plane game object and attach this script to it and it should work without any problems.
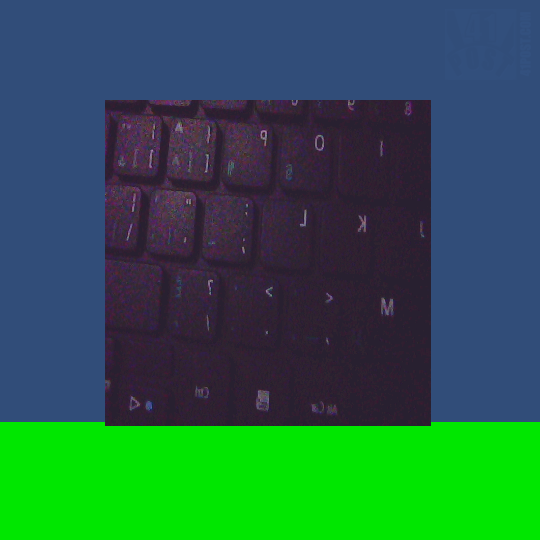
Running this script yields in the following result:

This is what the webcam video input looks like when rendering it as a textured plane.
This is the shortest and most simple way to obtain the images captured by a webcam. However, this script doesn’t check for any attached webcam, and it should throw some errors if it doesn’t find one. Additionally, if there is more than one camera connected to the computer, this script will obtain the video input from the first webcam it finds. Since this tutorial is all about selecting which camera will be streamed as a texture, the following script is going to have the same logic as the one above, however it allows the user to change which webcam video input should be rendered as a texture. Here’s the code:
using UnityEngine;
using System.Collections;

public class MultipleWebCamPreview: MonoBehaviour
{
	//The texture that holds the video captured by the webcam
	private WebCamTexture webCamTexture;

	//An array that stores a reference to the names of all connected webcams
	private string[] nameWebCams;

	//The current webcam
	private int currentCam = 0;

	//The selected webcam
	private int selectedCam = 0;

    void Start()
	{
		//An integer that stores the number of connected webcams
	    int numOfCams = WebCamTexture.devices.Length;

		//Initialize the nameWebCams array to hold the same number of strings as there are webcams
		this.nameWebCams = new string[numOfCams];

		//Get the name of each connected camera and store it into the 'nameWebCams' array
		for(int i = 0; i < numOfCams; i++)
		{
			this.nameWebCams[i] = WebCamTexture.devices[i].name;
		}

		//Initialize the webCamTexture
		webCamTexture = new WebCamTexture();
		//Assign the images captured by the first available webcam as the texture of the containing game object
        renderer.material.mainTexture = webCamTexture;
		//Start streaming the images captured by the webcam into the texture
        webCamTexture.Play();
	}

	void OnGUI()
	{
		//Render the SelectionGrid listing all the cameras and save the selected one at 'selectedCam'
		selectedCam = GUI.SelectionGrid(new Rect(20,20,200,50), currentCam, nameWebCams, 1);

		//If the selected camera isn't the current camera
		if(selectedCam != currentCam)
		{
			//Assign the value of currentCam to selectCam
			currentCam = selectedCam;
			//Stop the streaming of captured images
			webCamTexture.Stop();
			//Assign a different webcam to the webCamTexture
			webCamTexture.deviceName = WebCamTexture.devices[currentCam].name;
			//Start streaming the captured images from this webcam to the texture
			webCamTexture.Play();
		}
	}
}
In this script, four member variables are being declared: a WebCamTexture, a string array and two integers. The WebCamTexture has the same purpose of the one declared on the previous script, which is to stream the camera input into a Texture. The array of strings are later going to be used to store the names of all webcams connected to the computer. Finally, the two integers are there just to control which camera input should be streamed as a texture. These variables will store the current and the selected cameras (lines 7 through 16).
Inside the Start() method, a local integer is being declared and initialized, by storing the length of the static WebCamTexture.devices array. This static array holds objects of the type WebCamDevice – they are references to the webcams that have been connected to the computer (line 21). With that value, the nameWebCams is initialized so it can hold the same number of strings as WebCamDevices (line 24). The for loop at lines 27 through 30 is there to fill the nameWebCams array with the name of the webcam devices.
Still inside the Start() method, the webCamTexture variable is being initialized and it’s being set as the containing game object’s texture (lines 33 and 35). Lastly, the first webcam video begins to be streamed to a Texture at line 37, by calling the Play() method from the webCamTexture, just like the first script presented earlier on this post.
Moving on, inside the OnGUI() method definition, selectedCam stores the value of the camera that had been selected by the user at the SelectionGrid (line 43). The if statement that follows it just checks whether the selected camera isn’t the current camera (line 46). If this condition is met, the value of the selectCam is stored at the currentCam (line 49) and the streaming of the webcam input is stopped (line 51).
Not only that, but the correspondent name of the WebCamDevice that is located at the position defined by the value of currentCam inside the WebCamTexture.devices array is obtained and passed to the deviceName property of the webCamTexture (line 53). By doing so, the input webcam is switched to the one that has been selected at the SelectionGrid. With everything set up, all that is left to do is to call webCamTexture.Play(), to initiate the streaming of the newly assigned webcam video input to a Texture.
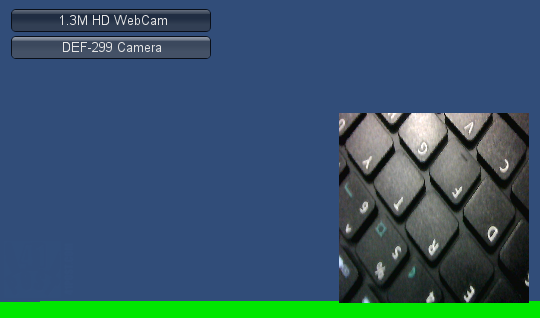
That’s it! Here’s a screenshot of the script in action:

Screenshot of the above script, after attaching it to a plane. Notice the Selection Grid at the top left corner of the screen. Either webcam can be selected.
Final Thoughts
Displaying the webcam input into a texture in Unity is simpler that it appears to be. What is most surprising is the fact that the Unity free license accepts streaming a webcam video input to a texture, specially considering it doesn’t allow developers that use this license to playback movies using the MovieTexture.
Also, there’s an excellent post on this subject here that explains how to set up the required permissions for the WebPlayer to access the webcam and some solutions to other problems that may happen when trying to create a script of this type.
As a last piece of advice: use a white Unlit Texture to render the streamed texture from the webcam if it’s too dark. As promised, here’s an example project:
Downloads


Nice tutorial once again!
Do you plan to write one about streaming webcam feeds?
Thanks a lot!
Unfortunately I won’t be able to write a tutorial about streaming webcam feeds because my Unity Pro license has expired. Again, thanks a bunch!
hi, thanks for your blog, isgreat, really
i got a question, do you tested this post with the webcam on ios?
do you khow if it works?
thanks a los in advance
No, I haven’t tested this code on iOS. If you do that, please, share your findings.
thx, It works fine with iOS (‘_’)
Thank you.
Great Tutorial ! Im very new to unity. How can I run this? What should I do after downloading the .zip file. Appreciate your help.
First unzip the file. You will end up with a folder called ‘MultipleWebcams’. Place it in the same directory where you usually have your other Unity project folders.
Then, after opening the Unity Editor select File -> Open Project. Finally, select the ‘MultipleWebcams’ folder you have just unzipped. It should load the project. This process can be repeated in order to open any other Unity projects as well.
Very Nice!
But i`ve a question… How can i do to save on disk multiple webcam array images, in just one click.
I`m trying to do a bullet time effect with 20 low cost cameras :)
please help